





In scenarios like managing multiple TikTok accounts or running multiple Amazon stores, combining a fingerprint browser with an IP proxy service is a standard practice for safeguarding account security. As a widely used fingerprint browser, BitBrowser generates an isolated browser environment for each window, complete with unique device info, fonts, time zones, and other parameters. However, to ensure these windows are also isolated at the network level, you need a reliable outbound IP service. If you only isolate the device fingerprints but let multiple windows share the same network connection, platforms can still link the accounts through their login IPs, undermining your previous anti-association efforts.
Using BitBrowser as an example, this guide will walk you through integrating 9HTTP to help your operations team build a more comprehensive anti-association setup.
Step 1: Get Your Connection Details
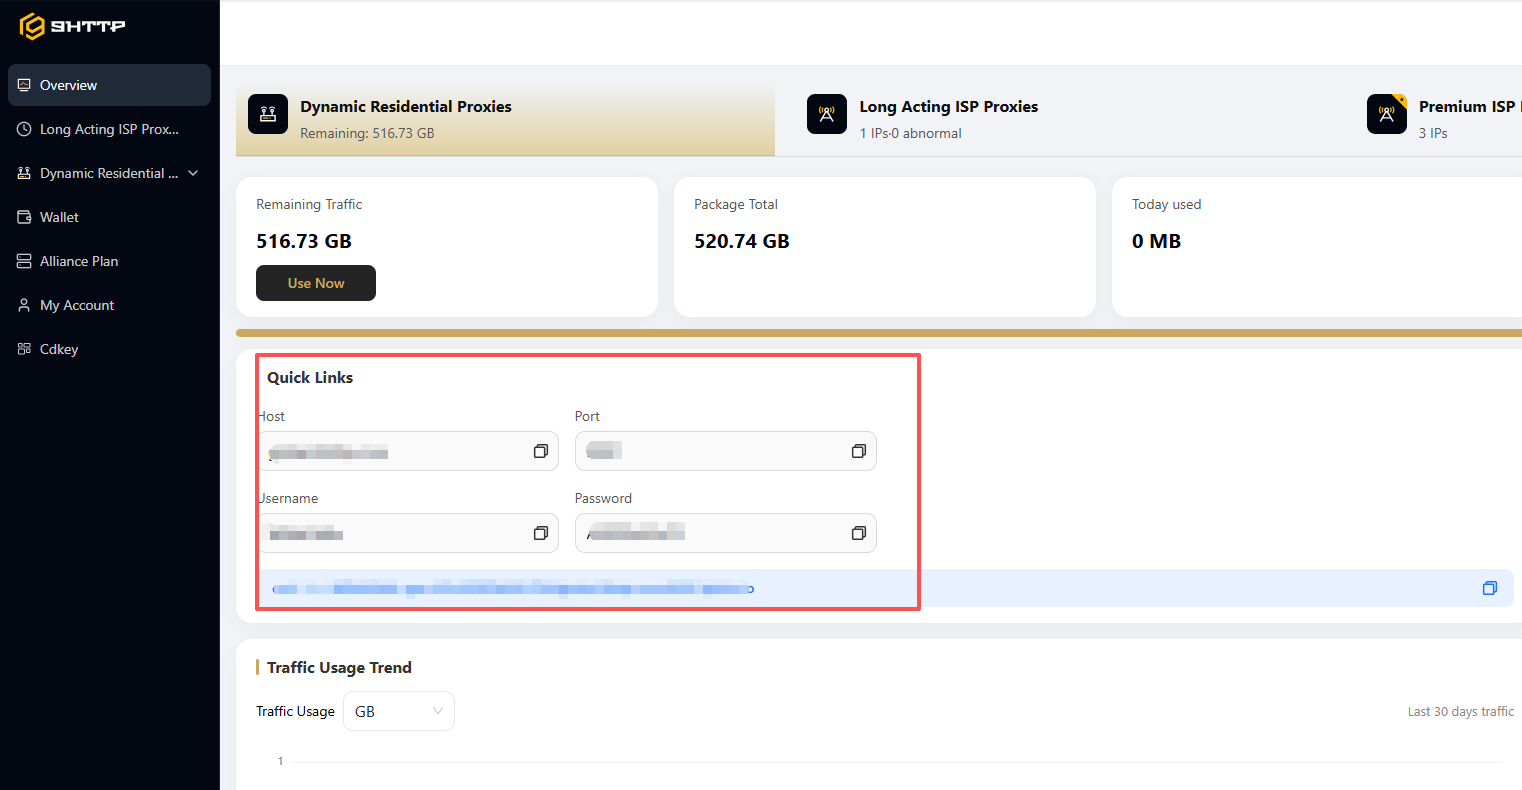
Log in to the 9HTTP dashboard. On the management page, select the line type you need (e.g., dynamic residential IP, long-term ISP line, or static IP). The system will automatically generate the corresponding host address, port, username, and password. You'll use these parameters to bind the proxy in your browser. Different business scenarios require different line types, so choose wisely based on your accounts' target regions and platform requirements.
Step 2: Create a Browser Window
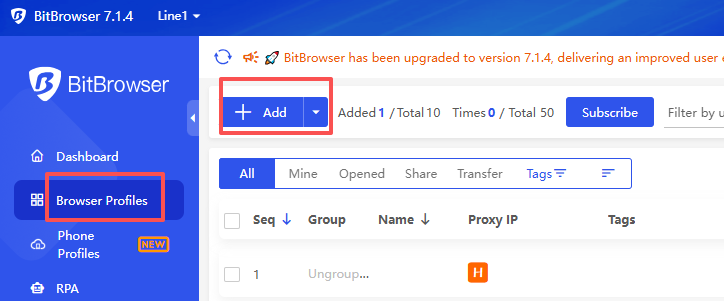
Open BitBrowser and click "New Window" to enter the configuration page. Set up your device fingerprint parameters first, then proceed to the network configuration step.
Step 3: Configure Network Settings
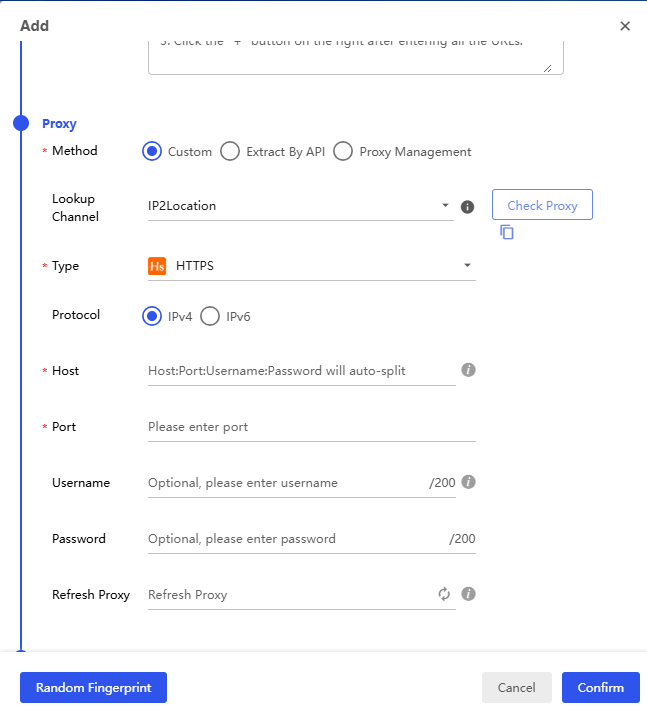
In the "Proxy Settings" section, set the connection method to "Custom Proxy." Choose the protocol type (HTTP, HTTPS, or SOCKS5) based on the info provided in your 9HTTP dashboard. Next, fill in the host address, port, username, and password. Pay close attention to case sensitivity to avoid connection failures caused by typos.
Step 4: Test and Save
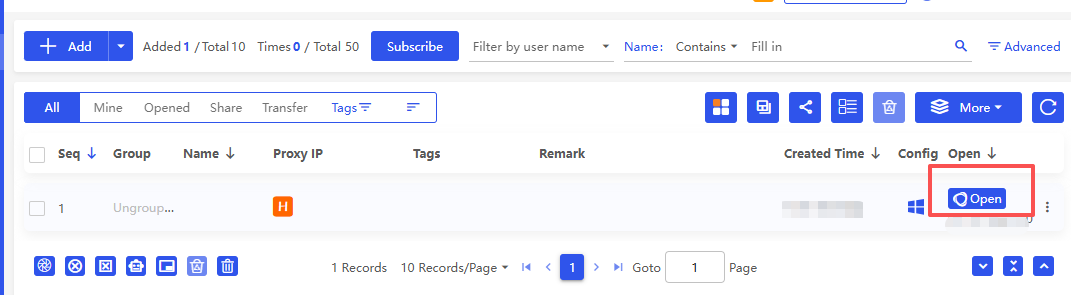
Once filled out, click the "Test Proxy" button to verify the connection status and authentication details. If the page displays the correct geolocation info, your configuration is successful. After confirming everything is correct, click "OK" to create the window. From now on, this window will automatically route traffic through this proxy line.
Step 5: Batch Creation (Optional)
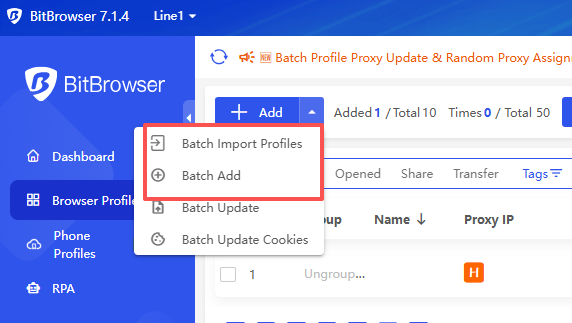
If you need to configure multiple accounts at once, you can export the info list from the 9HTTP dashboard and use BitBrowser's bulk import feature to bind multiple windows in one go. This is perfect for teams managing accounts at scale and saves a lot of repetitive work.
Once these steps are complete, each BitBrowser window will have its own unique fingerprint environment and dedicated outbound IP line, providing solid network-level support for multi-account operations on platforms like TikTok and Amazon.
Pro Tip: After configuring, it’s best to test account logins and usage on a small scale first. Monitor the stability for a while before scaling up to avoid the risks associated with launching too many accounts at once. Also, as your team expands, plan your proxy line capacity ahead of time based on your business pace. This prevents last-minute scrambles that could disrupt your normal operations.