9HTTP



 3 phút đọc


In cross-regional market research, global digital advertising verification, and localized testing across multiple environments, network independence and authenticity are essential foundations for stable business operations.
CloakBrowser is a multi-environment management and browser configuration tool that allows users to create and manage multiple independent browser profiles. Each profile can be configured with its own browser fingerprint, proxy, cookies, and browsing history. This helps users distinguish between different browsing environments and establish isolated environments for different tasks.
However, software-level environment isolation alone is not enough. If multiple independent environments share the same datacenter IP addresses, concentrated IP usage or datacenter network identification may lead to access frequency restrictions or inaccurate geographic positioning.
To build stable and independent business environments, combining CloakBrowser's environment management capabilities with 9HTTP's high-quality global residential proxy network is a practical approach. This article provides a step-by-step guide to configuring and testing 9HTTP proxies in CloakBrowser.
1. Choose the Right 9HTTP Proxy for Your Business Needs
CloakBrowser manages browser environments, while 9HTTP provides the underlying proxy network connection. You can think of them as a workspace and its network connection: after creating an independent workspace in CloakBrowser, you also need to configure a suitable external connection.
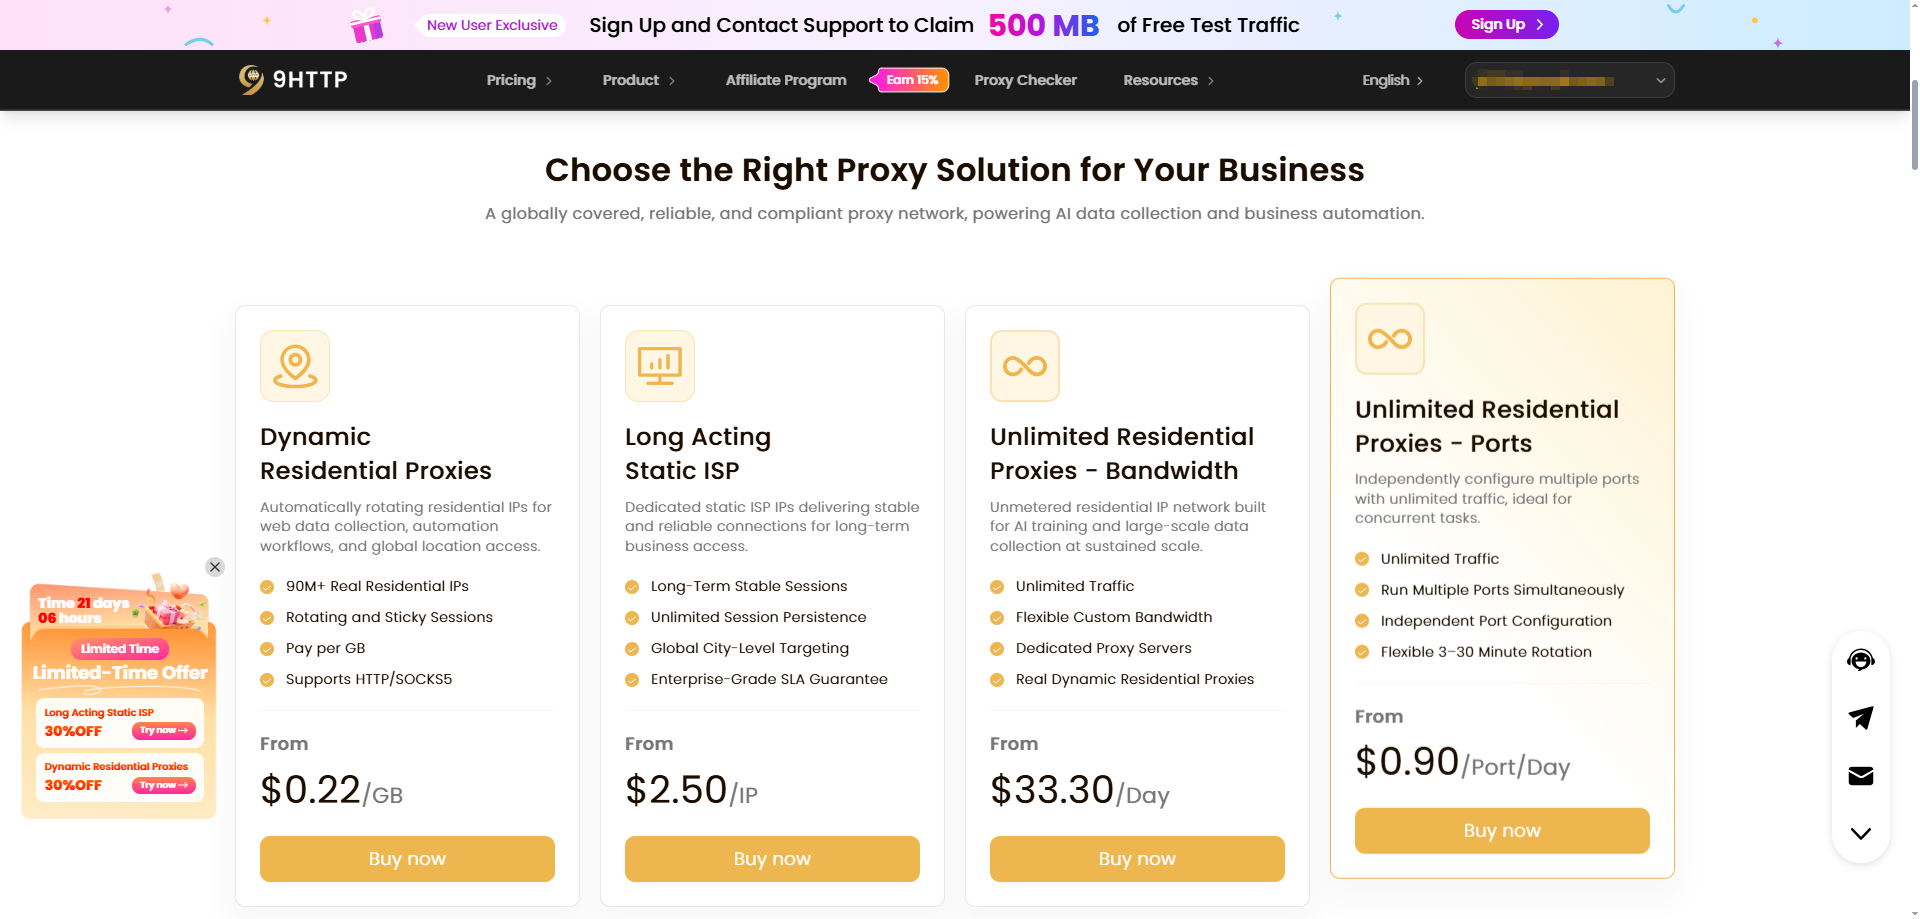
9HTTP offers the following proxy products. You can choose according to your target locations, session duration, and traffic requirements.
| Product | Key Features | Suitable Use Cases |
|---|---|---|
| Dynamic Residential Proxies | Coverage across 195+ countries and regions, supporting rotating and sticky sessions with traffic-based billing | Multi-region advertising verification and public market research |
| Long Acting Static ISP | Fixed, clean residential IPs designed for long-term, stable connections | Authorized multi-platform account management and ongoing regional business monitoring |
| Unlimited Residential Proxies | No traffic consumption limits, with flexible bandwidth and port options | Continuous, high-volume public data collection and testing in compliance with applicable requirements |
2. Preparation: Retrieve Connection Details from the 9HTTP Dashboard
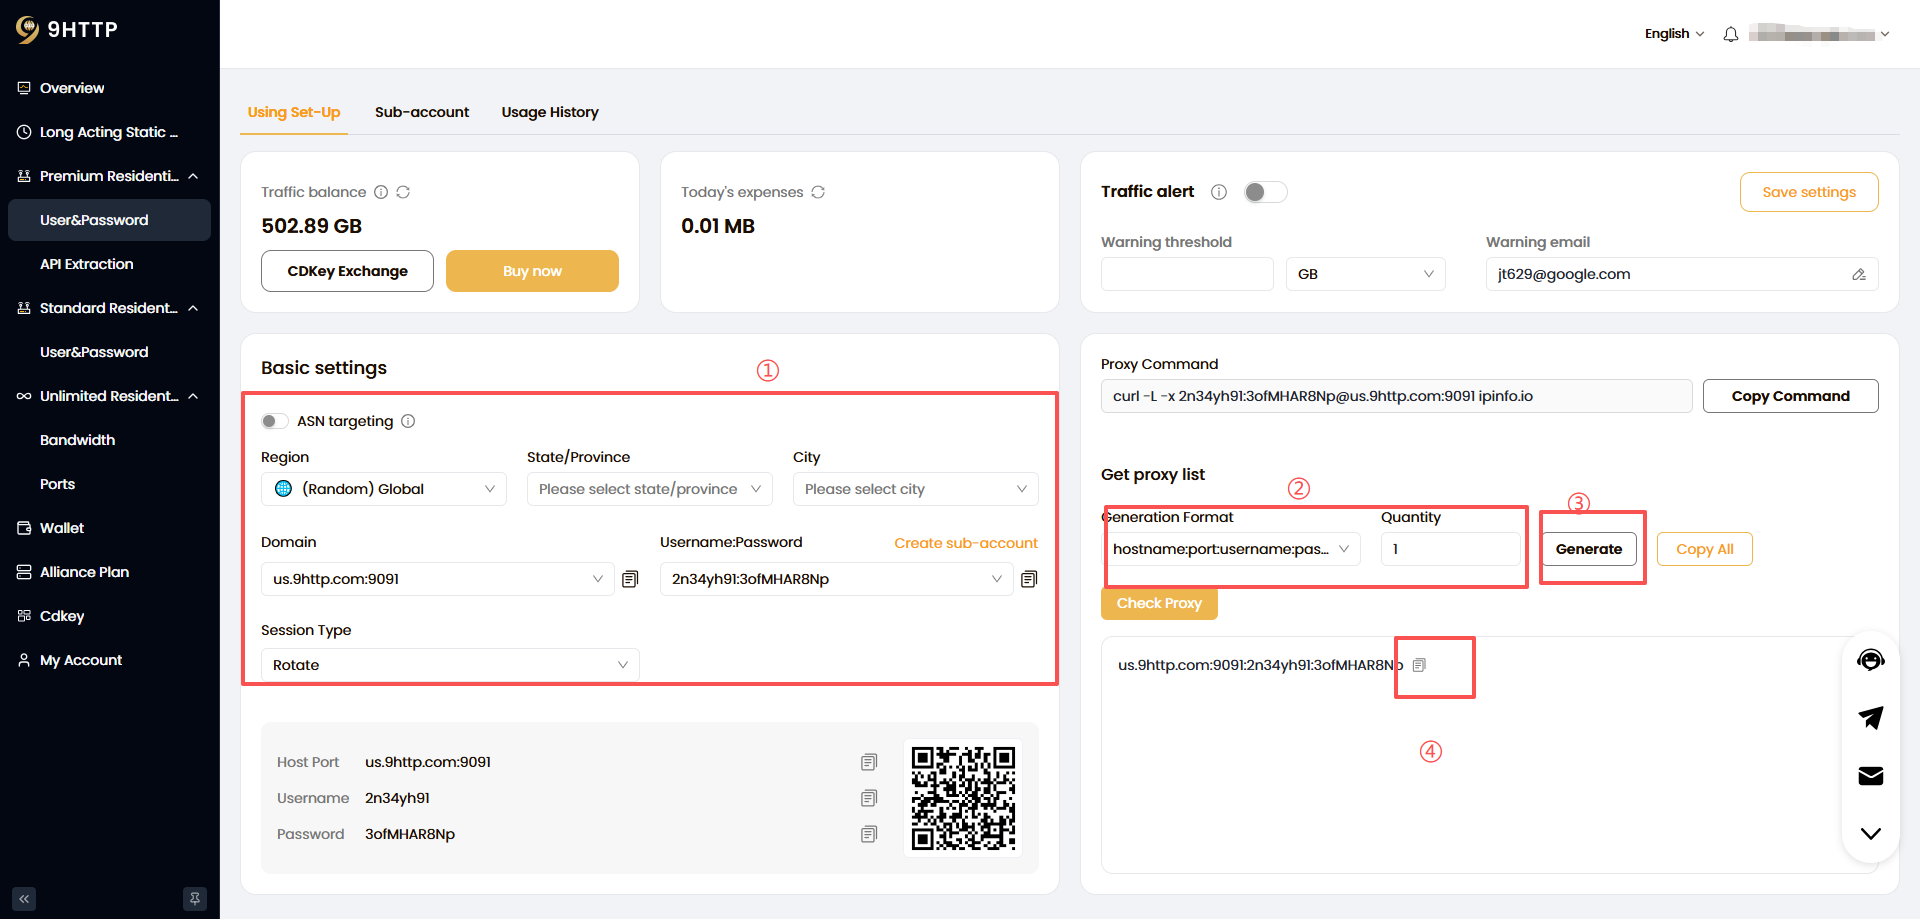
Before starting the configuration, log in to the 9HTTP dashboard and retrieve the connection details from the corresponding proxy product section.
- Select the required configuration options.
- Choose the proxy information format: username:password@hostname:port.
- Click the Generate button.
- Copy the generated proxy information.
3. How to Configure 9HTTP in CloakBrowser
Step 1: Create or Edit a Browser Profile
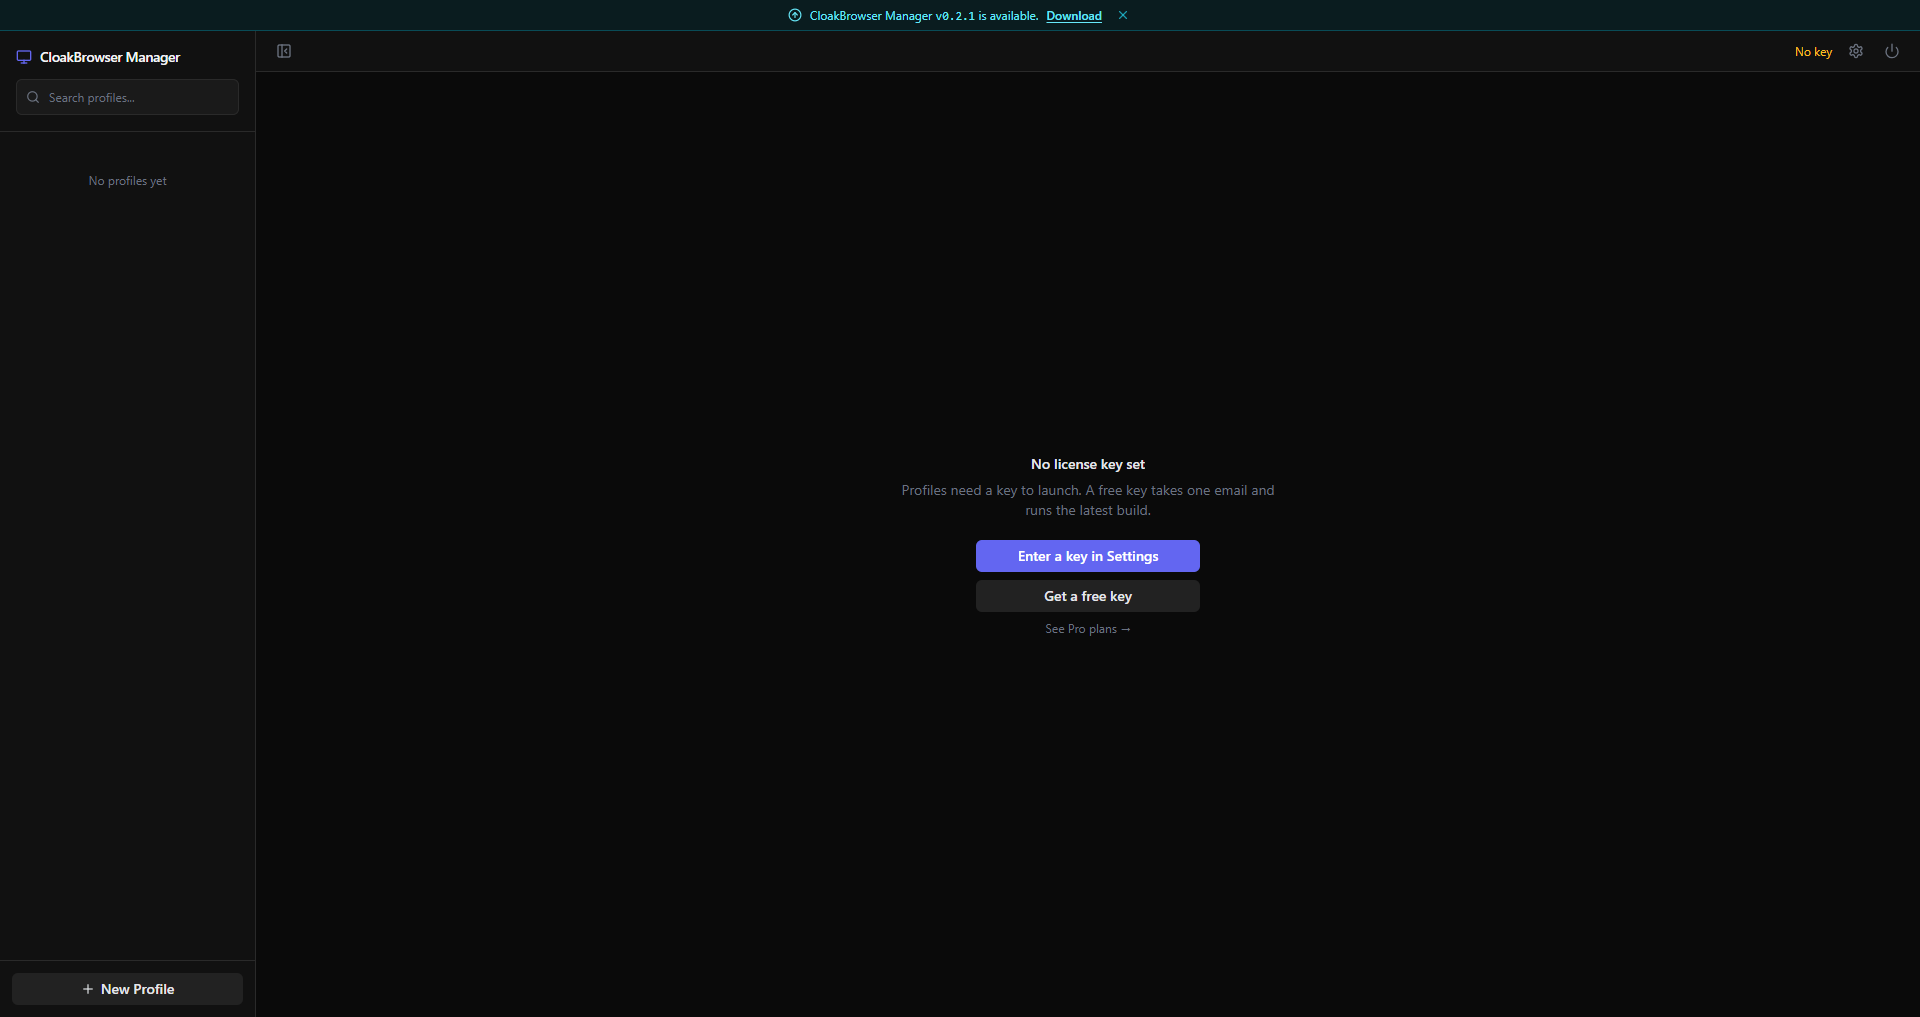
1. Open and log in to the CloakBrowser client
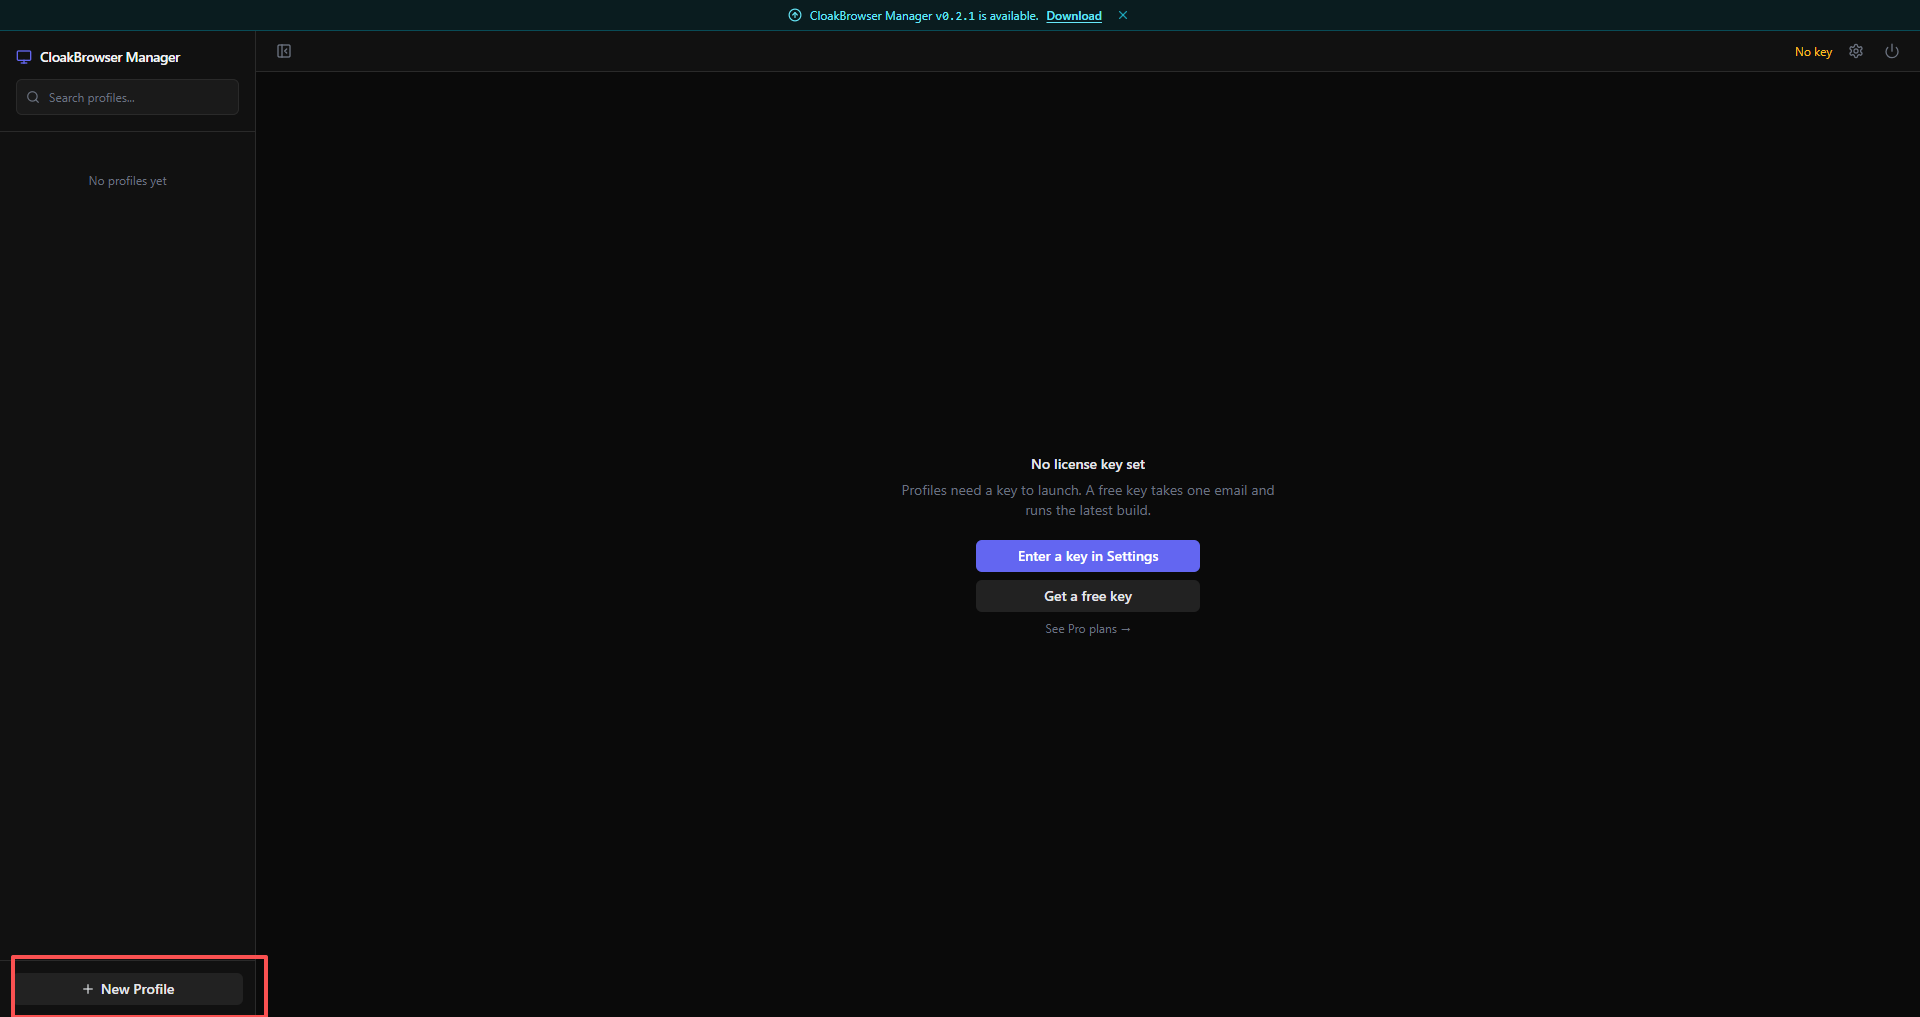
2. Click the New Profile button on the left sidebar.
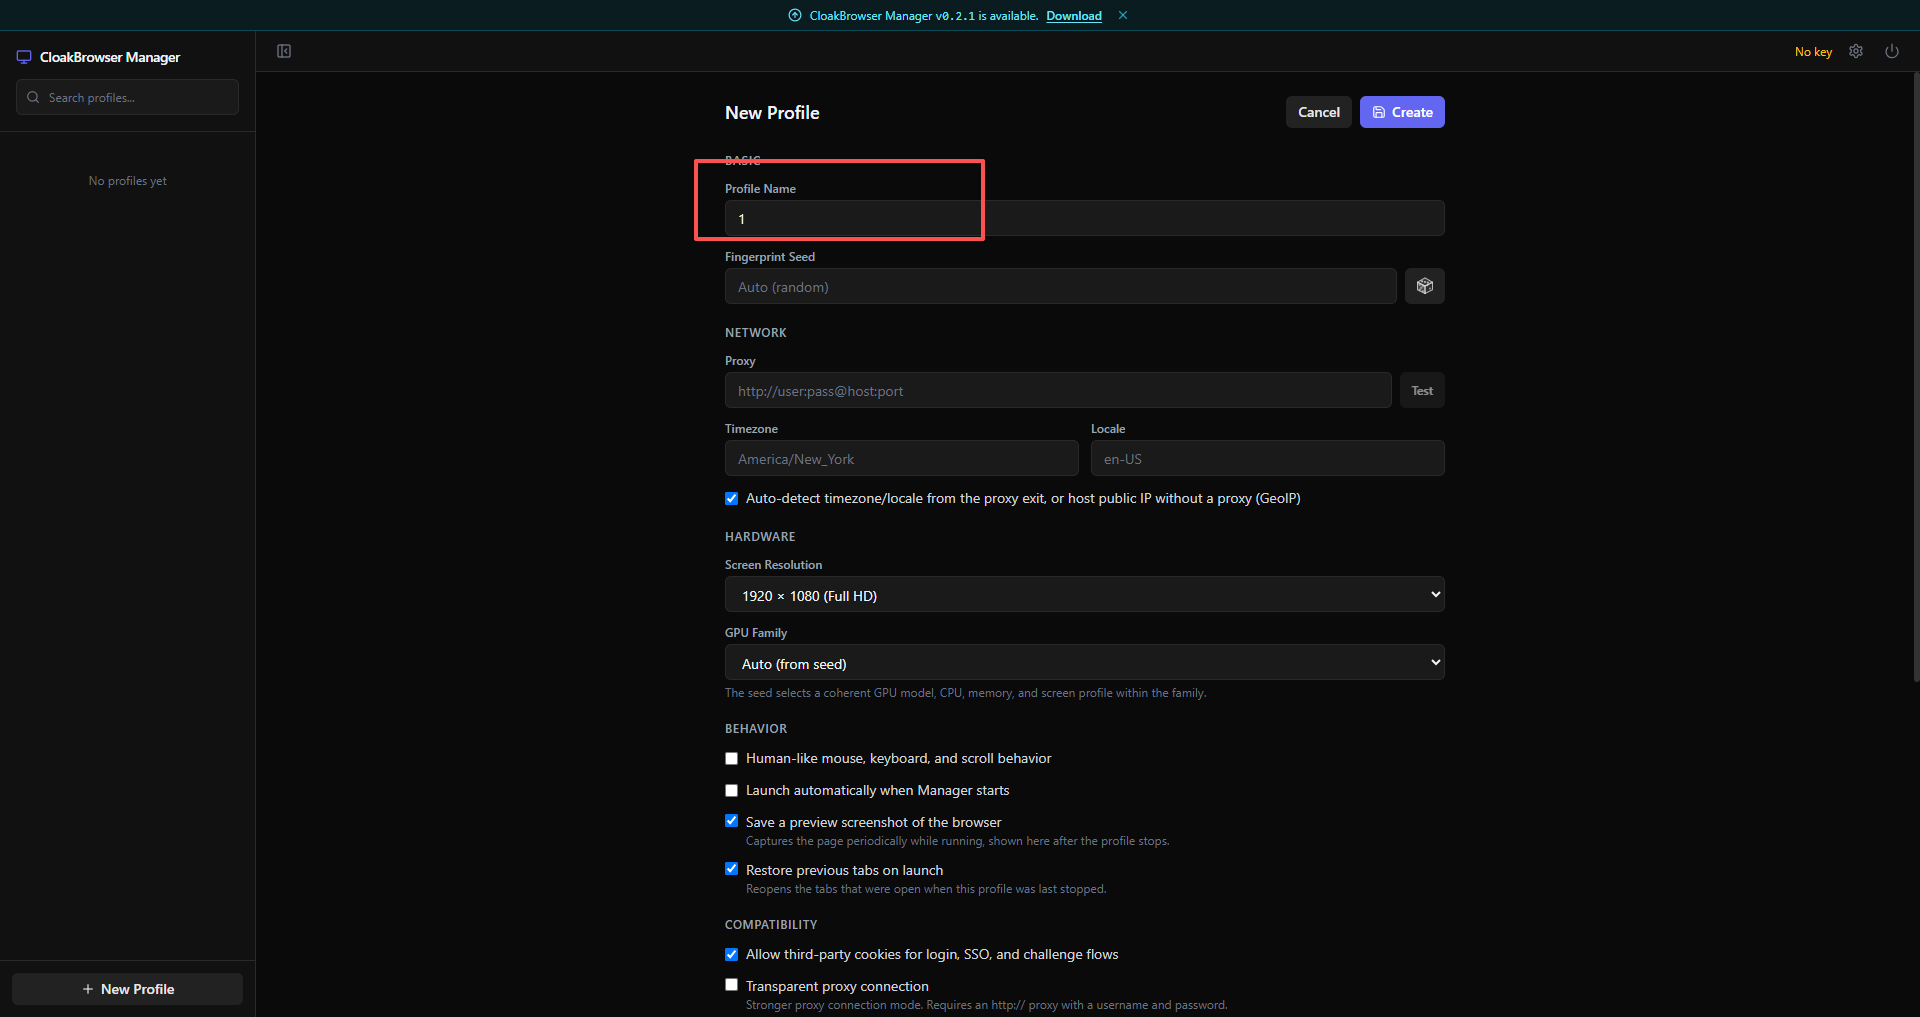
3. Enter a name for your browser environment.
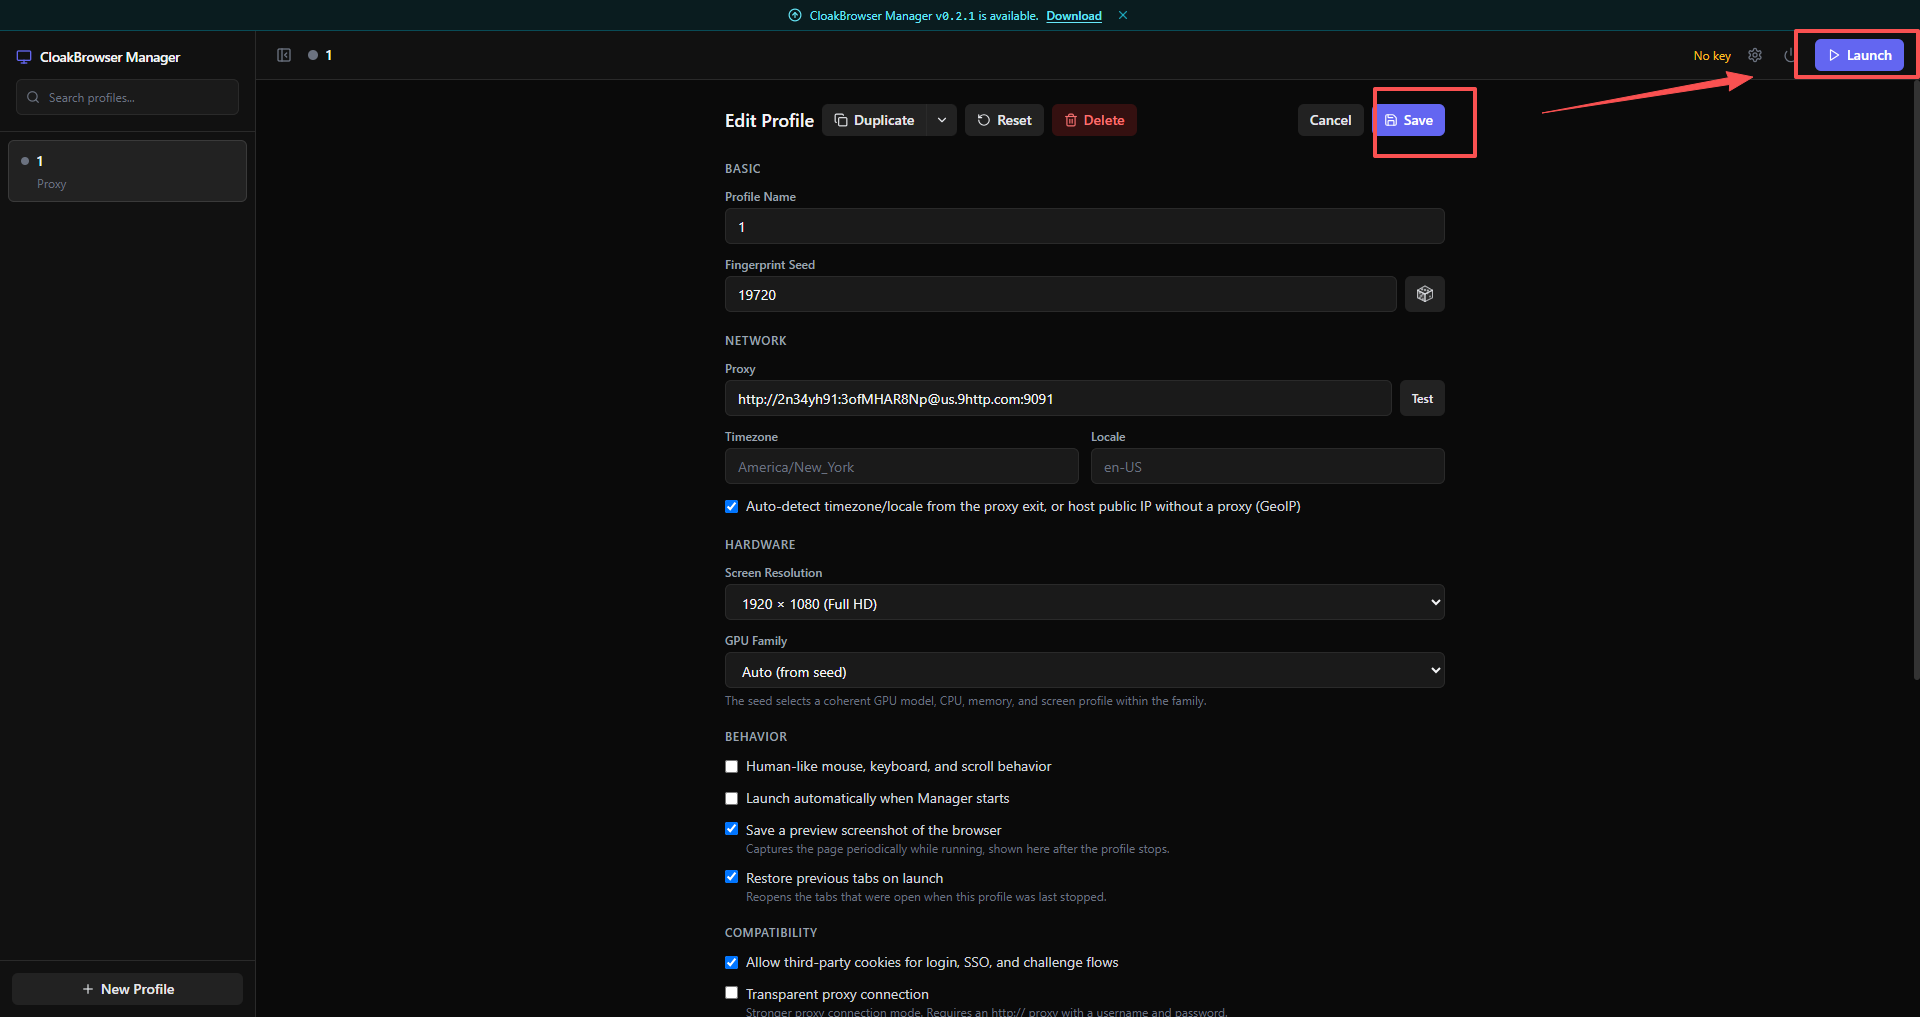
Step 2: Enter Your 9HTTP Proxy Details and Test the Connection
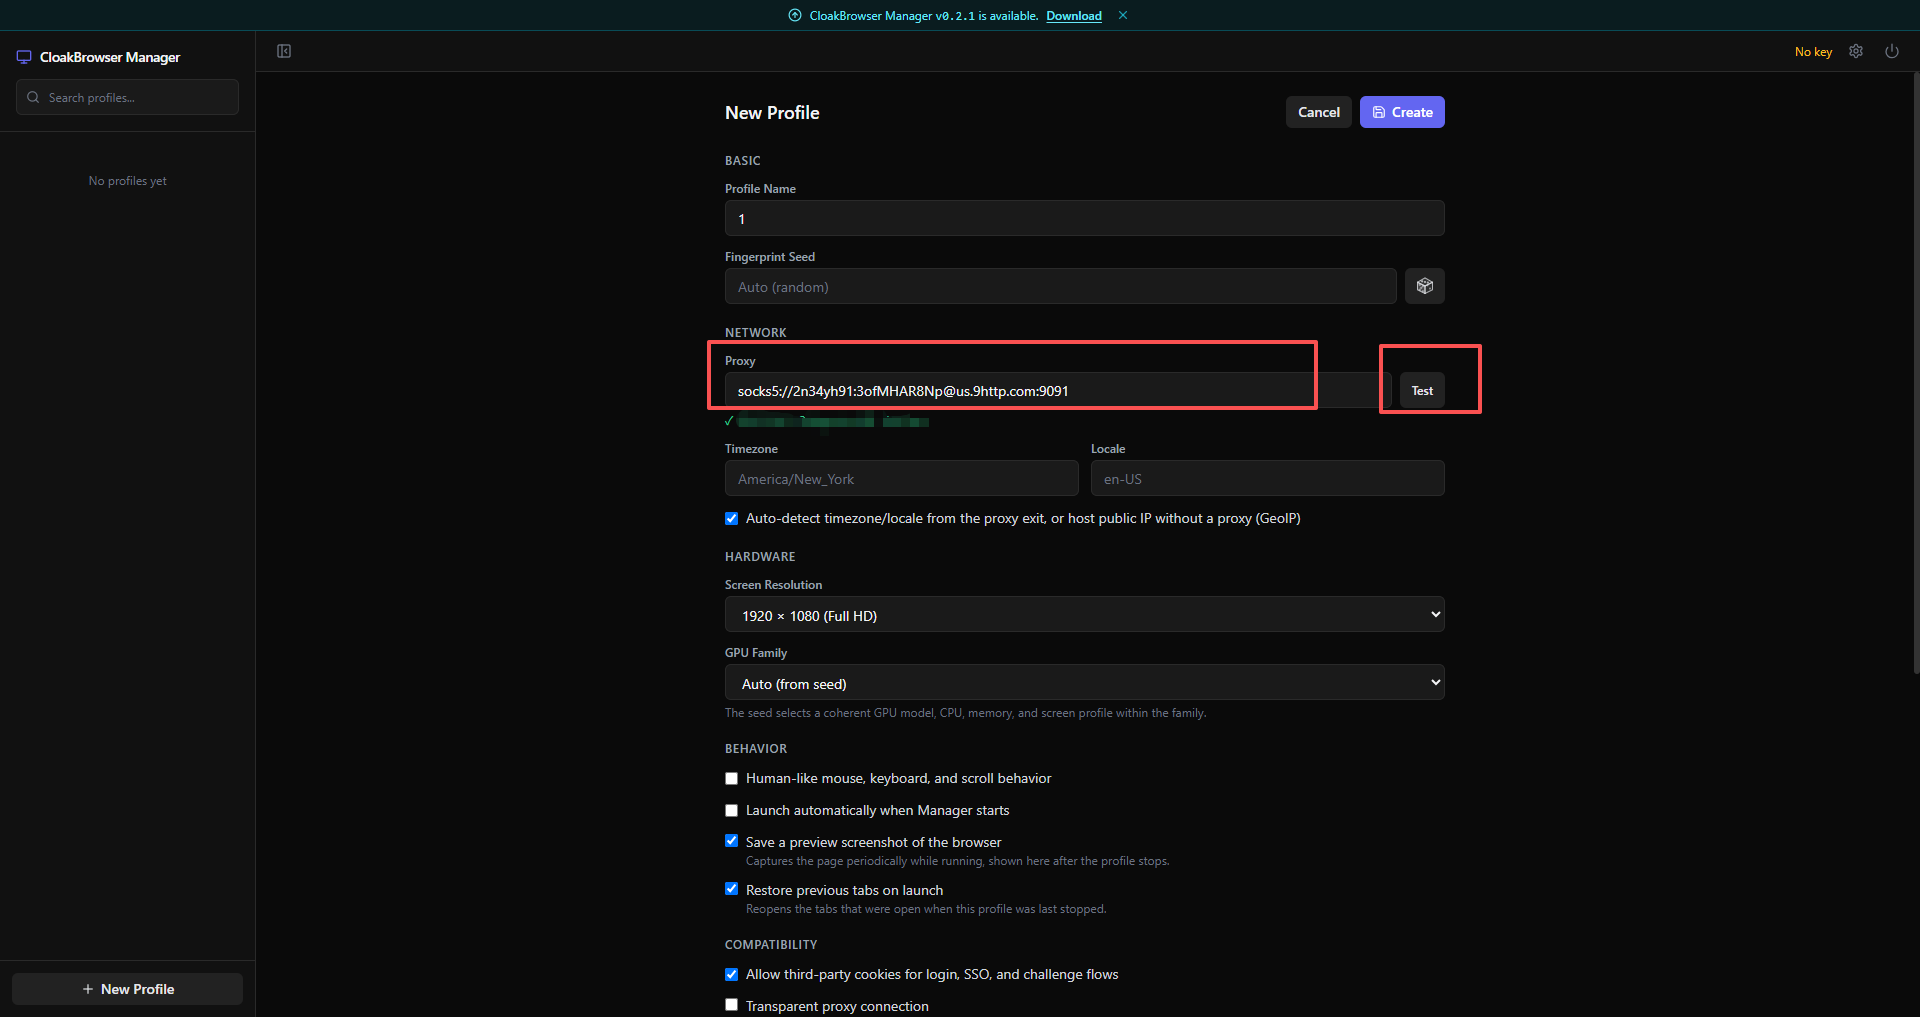
- In the Proxy input field, enter socks5:// followed by your 9HTTP proxy configuration.For example:socks5://2n34yh91:3ofMHAR8Np@us.9http.com:9091
- Click Test to check the connection. If the configuration is correct, the system will display a successful connection message.
Step 3: Save and Launch the Browser
After completing the configuration, save your profile and launch the browser.
Conclusion
By combining CloakBrowser's independent browser environment management capabilities with 9HTTP's high-quality residential proxy network covering 195+ countries and regions, teams can establish efficient and standardized workflows for global business testing and public data research.
👉 Visit the 9HTTP Official Website to configure a stable and efficient network connection for your business.